
How to install a power supply
Read the Safety Procedures. Very Important!!!
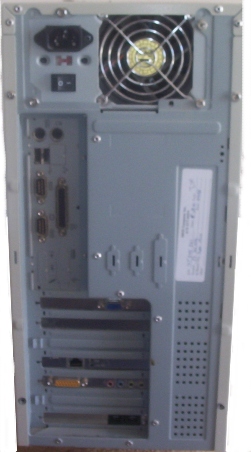
There are several different types of power supplies and computer cases. Because of this, there is numerous possibilities on how the power supply is mounted in the computer. Below shows one method but it may not apply to yours. However the removal and install of cables are similar.
To Install power supply follow these steps.
-
Disconnect all Cables that is attached to the computer. That means to disconnect the power cord, the keyboard, the mouse, the monitor, Printer, USB devices, modems and any other devices. This is very important!!!
 |
-
With everything disconnected, push the power button and hold it down for five seconds (DO NOT put the power cord in) This will drain any power that may be stored up in the computer.
-
Open the case. You will have to consult your computer manufacturer or manual on instructions on opening the case. There is many variations on computer cases and they all open differently. There is no way for me to list the procedure for it here.
-
Lay the computer down. (Don't be standing on carpet. Take it to the kitchen or somewhere where there is no carpet)
-
Touch the edge of the case where it is metal to make sure you don't have any static built up.
-
Disconnect the Power to all drives such as hard drive, CD-ROM, Floppy, Zip drives or any other type of drive. (the connector will just pull out. It will be snug) (You do not have to worry which one went to which. They are interchangeable so don't have to match the connector with a specific device)
-
There is three different types of power connectors that goes into the drives
-
Disconnect the ATX power cable. Squeeze the side of it as you pull up.
-
Disconnect the 4 pin ATX _12 Volt power cable
-
There may be other connectors you will need to disconnect. (There is too many different types of power supplies to list where to connect all the cables here. I would recommend drawing a diagram on a piece of paper of how the connections are on the original power supply before removing it. You then can use the diagram to connect the cables of the new one correctly)
-
Your system may have a different procedure to remove the power supply. This page will cover the general procedure that will work for most systems. If yours is different, consult your manufacturer for instructions.
-
Remove the four screws in the back of the system that is holding the power supply in. (Each computer is different and yours may not have four screws)
-
Remove the power supply.
-
Reverse the steps above to put the new power supply in.
-
Make sure the selector switch is on 115. (not all power supplies have this feature)
Note: if you are replacing the power supply due to hardware failure and you have the system stripped, try turning it on with nothing connected (no modem, no sound card, no memory so forth) If you get the proper indication that it is working. add one part at a time till the system is up and running or the problem returns. If it returns than you know it was the last part you put in.