
Completely remove Nvidia from system
Warning: This steps are not designed to cause any problems with your system. However if the steps is not followed correctly can cause issues. Also when altering the system, there is always a chance of an issue. It is a good practice to always have your system backed up before troubleshooting.
To remove NVIDIA, do the following (click hyperlink for instructions)
-
Go to Programs and Features
-
Remove the one that says NVidia Graphics Driver (yours may be worded different but similar and may have numbers after it) NOTE: Do not reboot the system when it asks you to reboot!
-
Remove anything else listed for NVIDIA (The system may not remove it and that is OK. Do not reboot the computer if it asks you to)
-
Close Programs and Features
-
Access View tab in Windows 10 or earlier Windows
-
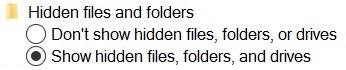
Select Show hidden files, folders, and drives under Hidden files and folders
 |
-
Click OK
|
|
-
Access Program Files
-
Highlight NVidia Corporation and delete the folder
-
Access Program Files x86 (You will only have this folder if your operating system is 64 bit. If you do not have this folder, skip to step 12)
-
Highlight NVidia Corporation and delete the folder
-
Access ProgramData
-
Highlight and delete anything that is for NVIDIA
-
Select the Roaming folder inside AppData
|
|
-
Delete any folder for NVIDIA (There may be more than one and may be worded different)
-
Select the Local folder inside AppData
|
|
-
Delete any folder for NVIDIA (There may be more than one and may be worded different)
-
Double-click HKEY_CURRENT-USER
-
Double-click Software
|
|
-
Delete NVidia Folder (There may be more than one)
-
Double-click HKEY_LOCAL_MACHINE
-
Double-click Software
|
|
-
Delete NVidia Folder (There may be more than one)
-