
Change Drive Letter
Windows 8
WARNING!!!
Some of the tools can cause data loss if used incorrectly or if an error occurs during use of a tool. Be sure your files are backed up and proceed with caution
WARNING!!!
If you want to change the drive letter of a drive, follow these steps.
-
Open Computer Management
-
Click on Disk Management
|
|
-
Scroll down to the drive you want to change the drive letter on
 |
-
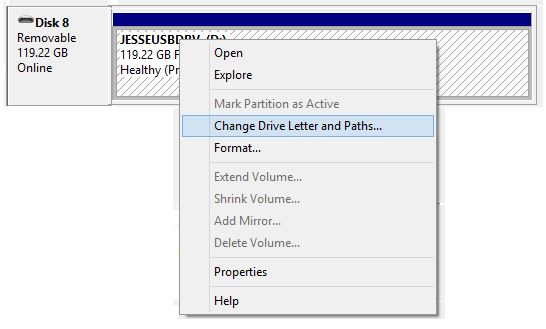
Right-click the drive
 |
-
Click Change Drive Letter and Paths
|
|
-
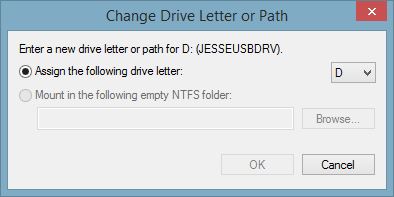
Select the drive letter you want
 |
-
Click OK
|
|
-
You may have to reboot for the settings to take affect
If you want the the drive letter to a drive letter that is already being used, you will need to change the drive letter of the other drive to a drive letter that is not being used, reboot the computer and then change the drive letter for the one you want to change to the drive letter you want.
For example, Lets say you have a a CD-ROM drive on drive letter D. You want to add another hard drive to the system and when you added the hard drive, the system made it drive letter E. You want the new hard drive to be drive letter D and the CD-ROM to be Drive letter E. To accomplish this you would have to do the following
-
Perform the steps above to change the drive letter for the CD-ROM to a drive letter that is not being used. For this example, make it Drive letter L.
-
Perform the steps above to change the drive letter for the hard drive to drive letter that is not being used. For this example, make it drive letter M.
-
Reboot the computer
-
Perform the steps above to change the CD-ROM from Drive letter L to Drive letter E.
-
Perform the steps above to change the hard drive from Drive letter M to Drive letter D
-
Reboot the computer
Now the drives are setup in the desired drive letters.